
HVAC Services
Get Professional Repairs From The Area's Trusted HVAC Technicians. Ask About Our Services! We Offer Professional Heating & Cooling System Repairs And Guarantee Long-Lasting Results.
Got Question? Call us: (850) 678-2665Financing
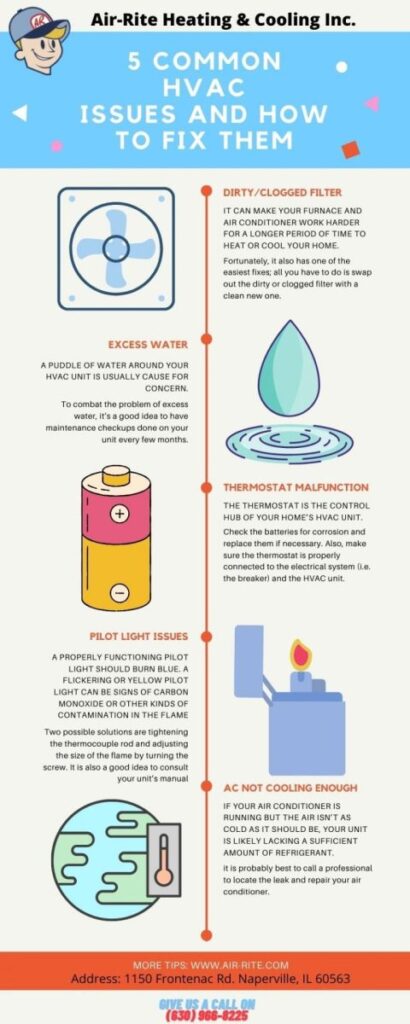
Common HVAC Issues and How to Fix Them
Learn how to troubleshoot and fix common HVAC issues in this informative post. From air conditioner not cooling to strange noises, we've got you covered.

Is your HVAC system giving you trouble? Don’t worry, we’ve got you covered. In this article, we will explore the most common HVAC issues homeowners face and provide simple solutions to fix them. Whether it’s a malfunctioning thermostat, a clogged filter, or strange noises coming from your unit, we’ll walk you through step-by-step to help you troubleshoot and resolve the problem. So, sit back, relax, and let’s get your HVAC system back in top shape!

This image is property of www.hasslerheating.com.
Common HVAC Issues
Having issues with your HVAC system can be frustrating, especially when it’s not functioning properly. It’s important to identify the problem and find a solution quickly to ensure the comfort of your home. Here are some common HVAC issues that you might encounter:
1.1. Air Conditioner Not Cooling
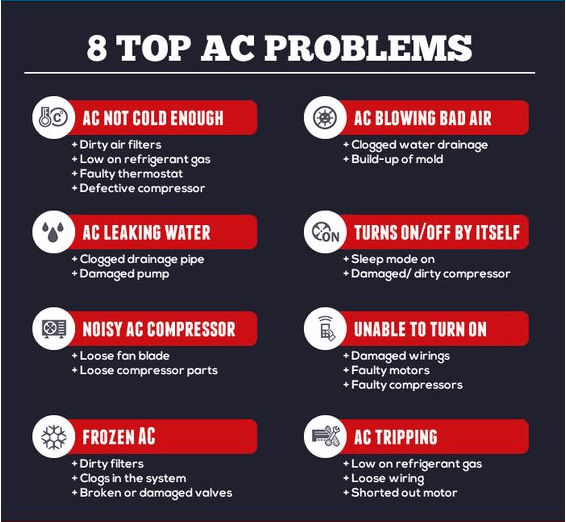
If your air conditioner is not providing the desired cool air, there could be several reasons behind it. First, check the thermostat settings to ensure it is set to the desired temperature. If everything seems fine, the problem could lie with a dirty or clogged air filter. cleaning or replacing the air filter can often solve this issue and improve the cooling efficiency of your AC unit.
1.2. Furnace Not Heating
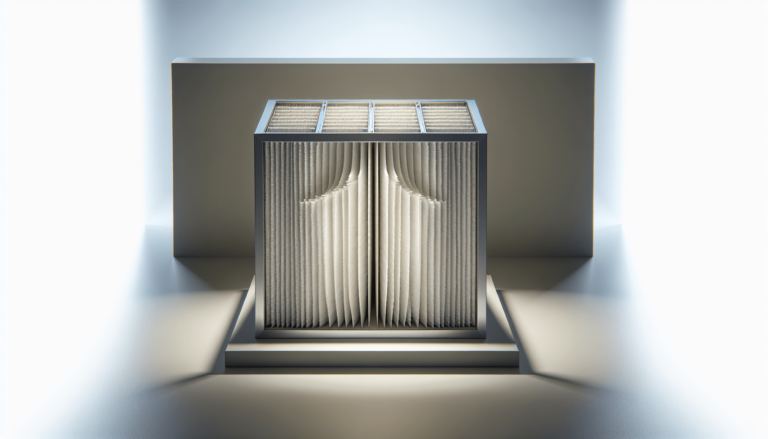
A furnace that fails to provide adequate heat can leave you feeling uncomfortable during the colder months. Start by checking the thermostat settings to ensure it is set to the desired temperature. If that’s not the problem, it could be a clogged or dirty air filter. Cleaning or replacing the air filter can help improve the airflow and heat distribution in your home.
1.3. Poor Airflow
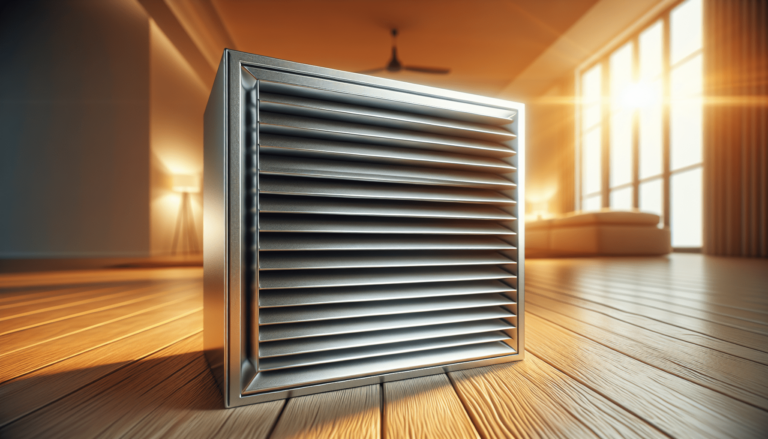
Poor airflow can make your HVAC system inefficient and cause discomfort. One common reason for poor airflow is a clogged or dirty air vent or register. Check and clean the air vents to remove any dust or debris that may be blocking the airflow. Additionally, inspecting and cleaning the blower motor can also help improve the airflow in your home.
1.4. Strange Noises
Unusual noises coming from your HVAC system can be a sign of a problem. It’s important to identify the type of noise to determine the underlying issue. Loose or damaged parts, such as screws or bolts, can create rattling or clanking sounds. Lubricating moving components and replacing worn-out or broken parts can often resolve strange noises.
1.5. High Energy Bills
If you notice a sudden spike in your energy bills, it could be a result of an inefficient HVAC system. Several factors can contribute to high energy consumption, such as poor insulation, air leaks, or outdated equipment. To reduce energy bills, consider using a programmable thermostat, sealing air leaks, improving insulation, and maintaining regular HVAC maintenance.
1.6. Thermostat Malfunctions
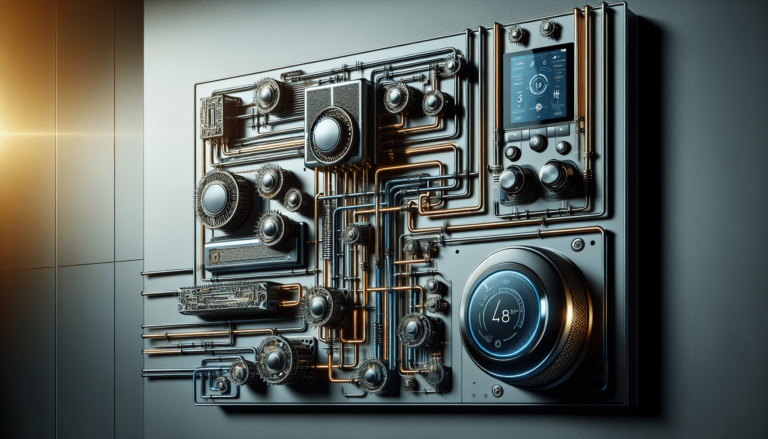
A malfunctioning thermostat can lead to temperature discrepancies and discomfort in your home. Start by checking the power source and batteries of the thermostat. Verify that the settings are accurate, and calibrate or level the thermostat if needed. Cleaning the thermostat components and checking the wiring connections can also help resolve any malfunctioning issues.
1.7. Frozen Evaporator Coils
Frozen evaporator coils can prevent your air conditioner from cooling effectively. Turn off the system and check for any restricted airflow. Clearing air vents and replacing dirty air filters can often resolve this issue. If the problem persists, it could indicate a refrigerant leak or a dirty evaporator coil that needs cleaning.
1.8. Leaking or Dripping HVAC System
Water leaks or drips from your HVAC system can be a sign of various issues. Start by identifying the source of the leak, which could be a clogged drain pipe, a damaged condensate pump, or a refrigerant leak. Clearing the drain pipe, repairing or replacing the condensate pump, and fixing any water leaks can help resolve this problem.
1.9. Uneven Temperatures
If you notice that some rooms are cooler or warmer than others, it could be due to uneven temperature distribution. Damaged or clogged ducts can restrict airflow and result in uneven temperatures. Checking and adjusting the fan speed, cleaning or replacing damaged ducts, and installing additional return vents can help improve temperature consistency throughout your home.
1.10. Bad Indoor Air Quality
Poor indoor air quality can affect your health and comfort. Regularly cleaning or replacing air filters can help remove dust, allergens, and pollutants from the air. Installing air purifiers or filtration systems, controlling humidity levels, proper ventilation, reducing chemical pollutants, avoiding smoking indoors, using natural air fresheners, and getting professional indoor air quality tests can all contribute to improving air quality.
Now that we have discussed some common HVAC issues, let’s explore how to fix them.
How to Fix Air Conditioner Not Cooling
2.1. Check the Thermostat Settings
Start by checking the thermostat settings to ensure it is set to the desired temperature. Sometimes, the setting might have been changed by mistake, causing the air conditioner not to cool properly. Adjust the temperature setting and wait for a while to see if the cooling improves.
2.2. Clean or Replace the Air Filter
A dirty or clogged air filter can restrict airflow and reduce the cooling efficiency of your air conditioner. Locate the air filter, usually found near the return air duct or blower motor, and clean or replace it if necessary. Cleaning or replacing the air filter regularly can help maintain proper airflow and improve the cooling performance.
2.3. Clear Blocked Condenser Unit
The condenser unit, located outside your home, can become blocked by debris, such as leaves, grass, or dirt. Make sure the condenser unit is clear of any obstructions that could restrict airflow. Use a soft brush or a garden hose to clean the exterior of the condenser coil.
2.4. Clean the Evaporator Coil
Over time, the evaporator coil of your air conditioner can accumulate dirt and dust, hindering its ability to cool the air. Turn off the power to the unit and locate the evaporator coil, usually found inside the air handling unit or above the furnace. Gently clean the coil using a soft brush or a vacuum cleaner to remove any dirt or debris.
2.5. Check the Refrigerant Levels
Low refrigerant levels can affect the cooling performance of your air conditioner. If you suspect a refrigerant leak, it’s best to call a professional HVAC technician to diagnose and fix the issue. They will be able to identify the source of the leak, repair it, and recharge the refrigerant to the correct levels.
2.6. Inspect and Repair Ductwork
Damaged or disconnected ductwork can lead to poor airflow and inefficient cooling. Inspect the ductwork for any visible damage or leaks. Seal any gaps or cracks with duct tape or call a professional to repair or replace damaged ducts. Properly sealed and insulated ductwork can improve the overall performance of your air conditioner.
2.7. Fix Electrical Issues
Electrical problems can also cause your air conditioner not to cool properly. Check the circuit breaker or fuse box to ensure there are no blown fuses or tripped breakers. If you’re not familiar with electrical work, it’s best to consult a professional HVAC technician to handle any electrical repairs.
2.8. Call a Professional HVAC Technician
If you have tried the above steps and your air conditioner is still not cooling properly, it’s time to call a professional HVAC technician. They have the expertise and tools to diagnose and fix complex issues with your air conditioner. A technician will be able to identify the root cause of the problem and provide the necessary repairs to get your air conditioner back to optimal performance.
Now, let’s move on to fixing the issue of a furnace not heating.
How to Fix Furnace Not Heating
3.1. Check Thermostat Settings
First, check the thermostat settings to ensure it is set to the desired temperature and in heating mode. Make sure the batteries are not dead and replace them if needed. If the thermostat is working correctly, proceed to the next steps.
3.2. Replace or Clean Air Filter
A clogged or dirty air filter can restrict airflow and impact the heating performance of your furnace. Locate the air filter, usually found near the blower motor or air handler, and clean or replace it if necessary. Regular cleaning or replacement of the air filter can help maintain proper airflow and improve the efficiency of your furnace.
3.3. Inspect Gas Supply and Valve
If you have a gas furnace, ensure that the gas supply valve is open and providing an adequate supply of gas. A closed or partially closed gas valve can prevent the furnace from heating properly. If you suspect a gas leak or any issues with the gas supply, contact a professional HVAC technician for assistance.
3.4. Check for Ignition Issues
Ignition problems can cause a furnace not to heat properly. Depending on the type of furnace, it can have either a pilot light or an electronic ignition system. Check if the pilot light is lit or if the electronic ignition is generating a spark. If not, follow the manufacturer’s instructions to relight the pilot light or troubleshoot the electronic ignition system.
3.5. Repair Damaged or Clogged Flue
A damaged or clogged flue can lead to restricted airflow and prevent your furnace from heating efficiently. Inspect the flue for any visible damage, such as cracks or holes. Additionally, check for any obstructions that may be blocking the flue. Clear any debris or call a professional HVAC technician to repair or replace the damaged flue.
3.6. Inspect and Fix Blower Motor
The blower motor is responsible for circulating warm air throughout your home. If the blower motor is not functioning correctly, it can affect the heating performance of your furnace. Inspect the blower motor for any visible damage or signs of wear and tear. Lubricate the motor if necessary or call a professional HVAC technician to repair or replace the blower motor.
3.7. Ensure Proper Ventilation
proper ventilation is essential for efficient heating. Ensure that all vents and registers are open and free from obstructions. Make sure furniture or other objects are not blocking the vents. Improving ventilation can help distribute heat evenly throughout your home and improve the overall heating performance.
3.8. Seek Assistance from HVAC Technician
If you have gone through the above steps and your furnace is still not heating properly, it’s time to seek assistance from a professional HVAC technician. They have the knowledge and experience to diagnose and fix complex issues with your furnace. A technician can identify the underlying problem and provide the necessary repairs to restore proper heating.
Now, let’s move on to fixing the issue of poor airflow.
How to Fix Poor Airflow
4.1. Check and Clean Air Vents
Start by checking all air vents in your home to ensure they are open and not blocked by furniture or other objects. Cleaning the vents by removing dust or debris can also help improve airflow. Use a vacuum cleaner or a soft brush to remove any dirt or obstructions from the vents.
4.2. Clear Obstructions from Registers
Check the registers, which are the grilles or covers attached to the ductwork, to ensure they are not blocked. Move any furniture or objects that may be obstructing the registers. Clearing obstructions from the registers will allow for better airflow and improve the overall performance of your HVAC system.
4.3. Inspect and Clean Blower Motor
The blower motor is responsible for pushing air through the ductwork. Over time, the blower motor can accumulate dirt and debris, leading to poor airflow. Inspect the blower motor and clean it if necessary. Use a soft brush or a vacuum cleaner to remove any dirt or debris from the blower motor blades and housing.
4.4. Remove Dirt and Debris from Ductwork
Dirt and debris can accumulate in the ductwork, restricting airflow and reducing the efficiency of your HVAC system. If accessible, remove the vent covers or grilles and use a vacuum cleaner with a long hose attachment to clean the ducts. Professional duct cleaning services are also available for a more thorough cleaning.
4.5. Adjust or Replace Damaged Ducts
Damaged or disconnected ducts can result in poor airflow and inefficient heating or cooling. Inspect the ductwork for any visible damage, such as leaks, holes, or disconnected sections. Seal any gaps or cracks with duct tape or call a professional to repair or replace damaged ducts. Properly sealed and insulated ducts can improve airflow and system performance.
4.6. Install Additional Return Vents
Insufficient return vents can restrict airflow and cause poor air circulation. Consider installing additional return vents in areas where there is a lack of proper airflow. Consult with a professional HVAC technician to determine the optimal locations for installing additional return vents.
4.7. Check and Adjust Fan Speed
The fan speed plays a crucial role in airflow. Ensure that the fan speed is set correctly on your HVAC system. If you’re not familiar with how to adjust the fan speed, consult the user manual or contact the manufacturer for assistance. Setting the fan speed to the appropriate setting can improve airflow and overall system performance.
4.8. Consult with HVAC Professional
If you have tried the above steps and poor airflow issues persist, it’s best to consult with a professional HVAC technician. They have the expertise and tools to diagnose and address more complex issues that may be causing poor airflow. A technician will be able to identify the root cause and provide the necessary solutions to improve airflow throughout your home.
Now, let’s explore how to fix strange noises coming from your HVAC system.
This image is property of www.air-rite.com.
How to Fix Strange Noises
5.1. Identify the Type of Noise
When strange noises occur, it’s essential to identify the type of noise to determine the underlying issue. Some common noises include rattling, clanking, grinding, buzzing, squeaking, or hissing. Pay attention to when the noise occurs and if it is more prominent during specific HVAC system operations, such as startup or shutdown.
5.2. Check for Loose or Damaged Parts
Loose or damaged parts can cause rattling, clanking, or grinding noises. Inspect the various components of your HVAC system, such as screws, bolts, panels, or fan blades, to ensure they are securely in place. Tighten any loose screws or bolts using the appropriate tools. If you notice any damaged or worn-out parts, consider replacing them.
5.3. Tighten Screws and Bolts
Vibrations in the HVAC system can cause screws and bolts to loosen over time, leading to strange noises. Using the appropriate tools, inspect and tighten any loose screws or bolts you find. Ensuring that all components are securely fastened can reduce vibrations and minimize noise.
5.4. Lubricate Moving Components
Worn-out or dry moving components, such as fan motors or blower bearings, can create squeaking or squealing noises. Proper lubrication can help reduce friction and eliminate these noises. Follow the manufacturer’s instructions to lubricate the moving components using the recommended lubricant.
5.5. Replace Worn Out or Broken Parts
If you notice any worn-out or broken parts, such as fan blades, belts, or bearings, they may need to be replaced. These damaged components can create unusual noises and affect the overall performance of your HVAC system. Contact a professional HVAC technician to identify the faulty parts and provide the necessary replacements.
5.6. Balance the System
An imbalanced HVAC system can result in noises caused by uneven airflow or pressure. Ensure that all dampers, which control the airflow to different areas of your home, are properly balanced. Adjusting the dampers can help achieve equal airflow and reduce noise caused by imbalances.
5.7. Seek Expert Help
If you have followed the above steps and the strange noises persist, it’s best to seek help from a professional HVAC technician. They have the experience and knowledge to diagnose complex issues and provide the necessary repairs. A technician will be able to identify the source of the noise and perform the appropriate fix.
Now, let’s move on to addressing the issue of high energy bills.
How to Reduce High Energy Bills
6.1. Use a Programmable Thermostat
A programmable thermostat allows you to set different temperatures for various times of the day, saving energy when you’re away from home or asleep. Set the thermostat to slightly higher temperatures during the summer and slightly lower temperatures during the winter to reduce energy consumption and lower your bills.
6.2. Seal Air Leaks
Air leaks around windows, doors, and other openings can lead to energy wastage and higher energy bills. Use weatherstripping or caulking to seal any gaps or cracks. Also, consider adding insulation to drafty areas, such as attics or crawl spaces, to prevent warm or cool air from escaping.
6.3. Improve Insulation
Proper insulation is crucial for maintaining a comfortable indoor environment and reducing energy consumption. Insulate your walls, floors, and attic to minimize heat or cool air loss. Consult with a professional insulation contractor to determine the appropriate insulation type and level for your home.
6.4. Maintain Regular HVAC Maintenance
Regular HVAC maintenance can improve system efficiency and reduce energy consumption. Schedule professional maintenance services at least once a year to clean and inspect your HVAC system. This helps ensure that all components are functioning optimally, reduces energy waste, and extends the lifespan of your equipment.
6.5. Replace Inefficient Equipment
Old or outdated HVAC equipment can be a major contributor to high energy bills. Consider replacing inefficient units with energy-efficient models. Look for the ENERGY STAR® label, which indicates that the equipment meets strict energy efficiency guidelines set by the Environmental Protection Agency (EPA).
6.6. Upgrade to Energy-Efficient Models
When upgrading your HVAC equipment, opt for energy-efficient models that are specifically designed to consume less energy. High-efficiency furnaces, air conditioners, and heat pumps can significantly reduce energy consumption and help lower your bills. Consult with an HVAC professional to determine the best options for your home.
6.7. Optimize HVAC System Sizing
An HVAC system that is too large or too small for your home can lead to increased energy consumption and inefficient operation. Ensure that your HVAC system is sized correctly to match the cooling and heating requirements of your home. Consulting with an HVAC professional can help ensure optimal system sizing.
6.8. Get Professional Energy Audit
A professional energy audit can provide valuable insights into your home’s energy consumption and identify areas for improvement. An energy auditor will assess your HVAC system, insulation, windows, and other factors that contribute to energy usage. Based on the audit results, you can implement energy-saving measures and make your home more efficient.
By implementing these energy-saving strategies, you can reduce your energy bills and make your HVAC system more efficient. Now, let’s move on to fixing thermostat malfunctions.
This image is property of www.searsheatingcooling.com.
How to Fix Thermostat Malfunctions
7.1. Check Power and Batteries
Start by checking the power source of your thermostat. Make sure it is securely connected to a functioning power supply, such as batteries or electrical wiring. If your thermostat uses batteries, check if they need to be replaced. Ensure the power source is providing the necessary power for the thermostat to function correctly.
7.2. Verify Thermostat Settings
Check the thermostat settings to ensure they are accurately set to the desired temperature and mode of operation (heating or cooling). Sometimes, incorrect settings can lead to temperature discrepancies and thermostat malfunctions. Adjust the settings if needed and monitor the thermostat to see if the issue is resolved.
7.3. Calibrate or Level Thermostat
A misaligned thermostat can affect its accuracy and performance. Ensure the thermostat is level and properly aligned with the wall or mounting plate. Use a level tool to ensure it is straight and adjust as necessary. Also, check if the thermostat requires calibration according to the manufacturer’s instructions.
7.4. Clean Thermostat Components
Dust, dirt, or debris on the thermostat can interfere with its operation. Gently clean the thermostat components using a soft brush or a slightly damp cloth. Be careful not to touch any electrical connections or sensitive parts. Keeping the thermostat clean can enhance its functionality and prevent malfunctions.
7.5. Check Wiring Connections
Loose or disconnected wiring can cause thermostat malfunctions. Turn off the power to the thermostat, remove the thermostat cover, and inspect the wiring connections. Ensure all wires are securely connected to their corresponding terminals. If you notice any loose or damaged wires, consult an HVAC professional to repair or replace them.
7.6. Replace Faulty or Outdated Thermostat
If all else fails, and your thermostat continues to malfunction, it may be time to replace it. Consider upgrading to a newer model with advanced features, such as Wi-Fi connectivity or programmable settings. Consult an HVAC professional to ensure compatibility and proper installation of the new thermostat.
7.7. Consult Thermostat Manufacturer
If you’re experiencing persistent issues with your thermostat, contacting the manufacturer’s customer support can provide additional guidance. They can offer troubleshooting tips or specific instructions for your thermostat model. Follow their instructions carefully and reach out for further assistance if needed.
7.8. Ask for Professional Assistance
If you’re unable to resolve the thermostat malfunctions on your own, it’s best to seek professional assistance. An HVAC technician can diagnose the underlying issue and provide the necessary repairs or replacements for your thermostat. They have the expertise and equipment to handle thermostat-related problems effectively.
Now, let’s explore how to fix frozen evaporator coils.
How to Fix Frozen Evaporator Coils
8.1. Turn Off the System
If you notice that your air conditioner’s evaporator coils are frozen, the first step is to turn off the system. This will prevent further damage and allow the coils to defrost naturally.
8.2. Check Airflow Restrictions
Frozen evaporator coils can be caused by restricted airflow. Check for any debris or obstructions around the air vents, return grilles, or air filters. Clear away any dirt, dust, or objects that might block the airflow. Improving airflow can help prevent the coils from freezing in the future.
8.3. Change the Air Filter
A dirty or clogged air filter can inhibit proper airflow, leading to frozen evaporator coils. Locate the air filter in your HVAC system and check its condition. If it’s dirty or clogged, replace it with a clean filter. Regularly changing the air filter can prevent a buildup of dirt and debris that can affect the efficiency of your system.
8.4. Defrost the Coils
Allowing the evaporator coils to defrost is essential for resolving the issue. It’s recommended to leave the system off for at least 24 hours to ensure complete defrosting. Make sure to place towels or a tray beneath the coils to catch any water that may drip during the thawing process.
8.5. Inspect and Repair Refrigerant Leak
A refrigerant leak can cause the evaporator coils to freeze. Inspect the coils for any signs of leakage, such as oil stains or frost accumulation. If you suspect a refrigerant leak, it’s crucial to call a professional HVAC technician to identify and repair the leak. They will also recharge the refrigerant to the correct levels.
8.6. Clean the Evaporator Coil
Once the coils have defrosted, it’s important to clean them to remove any dirt or debris. Gently brush off any dust or buildup using a soft brush or a vacuum cleaner. Be careful not to damage the delicate fins of the coil. Cleaning the evaporator coil regularly can help maintain its efficiency and prevent future freezing.
8.7. Schedule Regular HVAC Maintenance
To prevent frozen evaporator coils and other HVAC issues, it’s essential to schedule regular maintenance. An HVAC technician will inspect and clean the coils, check refrigerant levels, and ensure proper system operation. Regular maintenance can help identify and address potential problems before they escalate.
8.8. Seek Help from HVAC Expert
If you have followed the above steps and your evaporator coils continue to freeze, it’s best to seek help from a professional HVAC technician. They have the knowledge and experience to diagnose complex issues, identify the root cause, and provide the necessary repairs. A technician can ensure that your HVAC system operates efficiently and effectively.
Now, let’s move on to fixing a leaking or dripping HVAC system.
This image is property of thetrainingcenterofairconditioningandheating.com.
How to Fix Leaking or Dripping HVAC System
9.1. Identify the Source of the Leak
The first step in fixing a leaking or dripping HVAC system is to identify the source of the leak. Check around the HVAC unit, air handler, or the indoor and outdoor components to locate the origin of the leak. It could be a drain pan, condensate line, condensate pump, refrigerant line, or another component.
9.2. Check Drain Pan and Condensate Line
Examine the drain pan located beneath the evaporator coil or air handler. Ensure that it is not cracked or damaged. Check the condensate line that connects the drain pan to the outside of your home. If the drain pan or condensate line is clogged or damaged, it can cause leaking or dripping. Clear any clogs and repair or replace damaged components.
9.3. Clear Clogged Drain Pipe
A clogged drain pipe can obstruct the flow of condensate, leading to leaks or dripping. Locate the drain pipe, usually connected to the drain pan, and inspect it for any blockages. Clear any clogs using a wet/dry vacuum or by inserting a thin, flexible brush into the pipe to remove debris. Periodically flushing the drain pipe with a mixture of vinegar and water can also help prevent clogs.
9.4. Repair or Replace Damaged Condensate Pump
If your HVAC system has a condensate pump, check for any damages or malfunctions. A malfunctioning or broken condensate pump can cause water to accumulate and leak. Consult the manufacturer’s instructions or contact a professional HVAC technician to repair or replace the condensate pump if needed.
9.5. Inspect and Fix Refrigerant Leak
Water leaks near the indoor or outdoor units of your HVAC system could indicate a refrigerant leak. Refrigerant leaks require immediate attention as they can impact the performance and efficiency of your HVAC system. Call a professional HVAC technician to locate and repair the refrigerant leak, as well as recharge the system with the correct amount of refrigerant.
9.6. Test and Fix Water Leaks
If you notice water leaks or dripping from pipes, connections, or valves, it’s essential to inspect and fix them. Tighten loose connections or valves to stop the leaks. If the pipes are damaged or corroded, they may need to be replaced. Consult an HVAC technician or a plumber for assistance with fixing water leaks.
9.7. Seek Assistance from HVAC Technician
If you have followed the above steps and the leaking or dripping issue persists, it’s best to seek assistance from a professional HVAC technician. They have the expertise and tools to diagnose and address complex issues that may be causing the leak. A technician will be able to identify the source of the problem and provide the necessary repairs.
9.8. Preventive Measures for Future Leaks
To prevent future leaks or dripping, there are some preventive measures you can take. Regularly clean and maintain your HVAC system to ensure proper operation. Keep the area around the system clean and free from debris. Schedule regular professional maintenance to detect any potential issues before they escalate. These preventive measures can help minimize the risk of leaks and drips in the future.
Finally, let’s explore how to improve indoor air quality.
How to Improve Indoor Air Quality
11.1. Clean or Replace Air Filters Regularly
One of the easiest ways to improve indoor air quality is to clean or replace air filters regularly. Air filters trap dust, allergens, and pollutants, preventing them from circulating in the air. Clean or replace the filters according to the manufacturer’s instructions or as recommended by an HVAC professional. This will help ensure clean and healthy air in your home.
11.2. Install Air Purifiers or Filtration Systems
Air purifiers or filtration systems can help remove airborne pollutants and improve indoor air quality. These devices use filters or other technologies to capture and eliminate particles such as dust, pollen, pet dander, and smoke. Consult with an HVAC professional to determine the type and size of air purifier or filtration system that best suits your needs.
11.3. Control Humidity Levels
Excessive humidity can promote the growth of mold, mildew, and other allergens. Use a dehumidifier to control humidity levels in your home, particularly in areas prone to moisture accumulation, such as basements or bathrooms. Keep humidity levels between 30% and 50% to prevent mold growth and improve indoor air quality.
11.4. Ventilate Properly
Proper ventilation is essential for maintaining good indoor air quality. Open windows and use exhaust fans in kitchens and bathrooms to remove humidity, odors, and pollutants. Consider installing mechanical ventilation systems, such as whole-house ventilation or energy recovery ventilators, to ensure continuous fresh air circulation.
11.5. Reduce Chemical Pollutants
Chemical pollutants from cleaning products, paints, solvents, and other household items can negatively impact indoor air quality. Choose low or zero-VOC (Volatile Organic Compound) products whenever possible. Properly ventilate areas where chemical pollutants are used and store them safely in well-ventilated areas.
11.6. Avoid Smoking Indoors
Tobacco smoke is a significant source of indoor air pollution. Avoid smoking indoors to prevent harmful particles and chemicals from contaminating the air. Designate outdoor smoking areas or encourage smoking cessation to maintain a healthy indoor environment.
11.7. Use Natural Air Fresheners
Artificial air fresheners can release harmful volatile organic compounds into the air. Instead, use natural alternatives such as essential oils, natural potpourri, or fresh flowers to add a pleasant fragrance to your home. If you prefer scented candles, opt for those made from natural ingredients.
11.8. Get Professional Indoor Air Quality Test
If you’re concerned about your indoor air quality or want to assess potential pollutants, consider getting a professional indoor air quality test. An indoor air quality test can identify specific pollutants, allergens, or contaminants present in your home. Based on the results, you can take appropriate measures to address any air quality issues.
Improving indoor air quality is crucial for maintaining a healthy living environment. By implementing these strategies, you can reduce the presence of allergens, pollutants, and contaminants in your home and enjoy cleaner, fresher air.
In conclusion, HVAC issues can be frustrating, but many can be resolved with simple troubleshooting steps. If the problems persist or if you’re unsure about how to fix them, don’t hesitate to seek assistance from a professional HVAC technician. They have the knowledge and expertise to diagnose and resolve complex issues, ensuring the optimal performance of your HVAC system and the comfort of your home. Remember, regular maintenance and attention to your HVAC system can help prevent issues from arising in the first place. Stay proactive, and your HVAC system will continue to keep your home comfortable for years to come.

This image is property of assets.searshomeservices.com.
